|
I've been wanting to join a CSA for a long time. If you haven't heard of a CSA, it's an organized effort to provide locally grown food to a small group of subscribers. Typically, you pay a flat fee to join, and every week, you get a portion of whatever is being harvested that week. At our last property, I had room for a sizable veggie and flower garden, so didn't bother - we were able to grow a lot of our own food through the summer. At our new location, there isn't a lot of gardening space. Also, a career transition has taken me away from teaching, which lent itself to being a much more attentive gardener, with lots of summer hours to keep things weeded and flowering. This year it finally felt like the right time to get set up with a subscription to our local CSA at Charmingfare Farm. This particular CSA offers 20 weeks of whatever is growing and available each week, starting at the end of May. After a long New Hampshire winter, I anticipated the first day like a little kid waiting for Christmas. Every week feels like that - though I imagine the fun will wear off after a few more weeks. May in New Hampshire doesn't typically present with bumper crops of anything, except rain, so my expectations were low. I was pleasantly surprised to leave with a plethora of green things, freshly harvested. Fiddleheads, asparagus, a variety of fresh herbs, and chives were all available this first week. I used every bit of it. Read below for recipes. 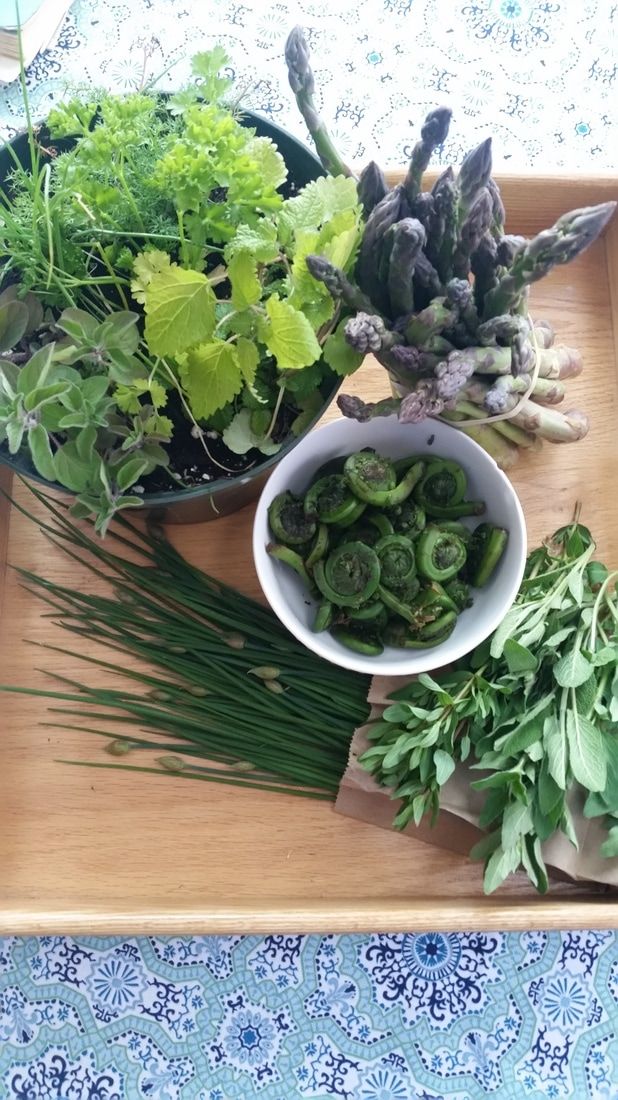 Sauteed Fiddleheads with Chives
To prepare fiddleheads, soak briefly in a bowl of cold water to remove dirt. Drop into boiling water for 3 minutes. Strain. Now they are ready to cook. I heated up a few tablespoons of olive oil and butter in a skillet, along with fresh garlic and chives. I added the fiddleheads and sauteed for about 5 minutes. Ready to serve! Oven-Roasted Asparagus Preheat over to 450 degrees. Cut the ends (about 1/2 inch) off of the stalks. For thin spears, leave whole. For thicker spears, slice in half the long way. Lay on a cookie sheet, drizzle with olive oil, and add a sprinkle of salt. Roast in the oven for 10-15 minutes, or until fork tender. Balsamic and Fresh Herb Marinade Mix 1/2 cup olive oil, 1 cup balsamic vinegar, 1 Tbsp sugar, 1 tsp salt, fresh ground pepper, and several tablespoons of fresh chopped herbs. I had oregano, marjoram, and basil on hand this week. This marinade works great with chicken or beef. Allow meat to sit in marinade for at least one hour, preferably overnight.
0 Comments
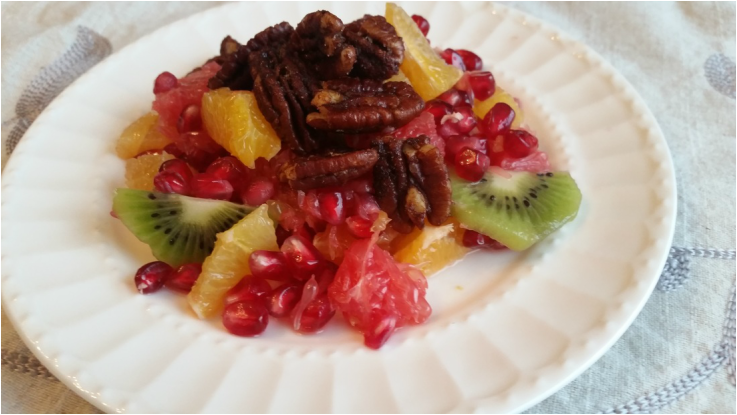 For a Thanksgiving dessert this year, I decided to bring a fruit salad, inspired mainly by the pomegranate that is becoming available in the grocery stores right now. Coupled with some Florida citrus and kiwi, the colors and flavors combine to make a tart yet sweet, jewel-y treat. Additionally, I've been craving gingerbread so I made a batch of gingerbread-inspired pecans to top the fruit salad. A few words about pomegranate: I tried this fruit for the first time while living in Turkey, where it is quite ubiquitous. It is available in markets, juiced for drinking, added to desserts, and used to make a type of sour sauce that is sometimes used in the way that one might use vinegar. My neighbor showed me how to open one and pull out the seeds, and I grew to love this delicious tart fruit. The seeds are beautiful - they look like rubies - and delicious - they pop with juice when you bite into them. I eat them by the spoonful, or mixed with plain yogurt. I still make a holy mess when I cut into one and pull the seeds out, but it's well worth it. Toasted Gingerbread Pecans 2 cups pecans 1 Tbsp sugar 2 tsp cinnamon 1/2 tsp nutmeg 1/2 tsp powdered ginger 2 Tbsp olive oil 1 Tbsp maple syrup Toss all ingredients in a large bowl. Once well combined, dump onto a cookie sheet lined with parchment. Bake at 400 degrees, stirring every 10 minutes twice for the first 20 minutes, and then every 5 minutes after. For the fruit salad, I combined several cups of peeled and sliced oranges, red and white grapefruit, kiwi, and the seeds from two pomegranates. Top the fruit salad with the nuts right before serving. 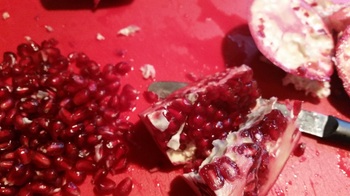 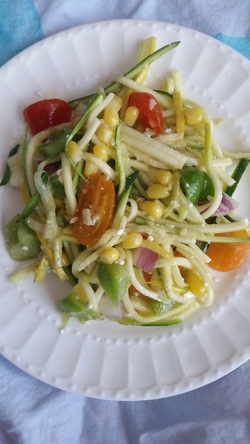 I'm often elected - or elect myself - to bring salad to gatherings. Green salad is great, but can get monotonous - and tricky to eat with plastic utensils from paper plates. I wanted to bring salad to a cookout today, but wanted something different. Something that will still star vegetables (not pasta), and that will be tasty and easy to eat. This recipe is grain-free, heavy on the veggies, and easy to put together.
I don't have a spiralizer or any other fancy gadgets for creating veggie noodles. Instead, I used an attachment for my OXO grater that juliennes things. I did that to one yellow squash and one zucchini, and it created several cups of squash noodles. In another iteration, I also did this to carrots to add extra crunch. I tossed them with the remaining ingredients, and the salad is ready to eat. It is chilling in the fridge now. You could really use any fresh veggies you have hanging around. This was what I happened to have, but I can imagine many variations of this recipe. Leave the feta out to make it vegan and dairy-free. Ingredients: 2-3 medium zucchini, summer squash, or any combination of both 1/2 cup chopped red onion 1 cup grape tomatoes, chopped 1 bell pepper, chopped 1 cup frozen corn 1/4 cup feta cheese, crumbled 1/3 cup olive oil 1/3 cup red wine vinegar 1 Tbsp sugar Salt and pepper to taste 1. Julienne the zucchini and/or squash and place in large bowl. 2. Add onion, tomatoes, pepper, corn, and feta cheese. Toss until well combined. 3. Add oil, vinegar, sugar, and seasonings. Toss to coat. Cover and refrigerate until ready to serve. 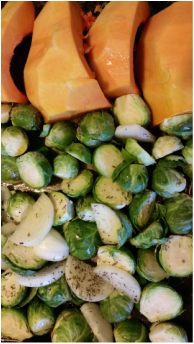 This was an on-the-fly concoction, a little bit of this, a little bit of that, thrown together on a busy Saturday morning following a busy week of work. It's adapted from Mom's Minestrone, but it is legume-free. This could easily be done on the stove top and would be ready to eat in 30-45 minutes. I opted for the crock pot, as I was having friends over in the evening but had a number of things that were going to keep me out and busy during the day.
I prefer with most of my crock pot recipes to throw everything in uncooked, as I figure that's kind of the whole point of using the crock pot. This time, though, I decided to saute the onions and garlic before adding them. I'm sure it would have been okay had I thrown them in raw, but this came out really nicely, so I would recommend cooking them ahead as I did. As with so many things in cooking, chopping the veggies into smaller, bite-sized pieces makes this soup even more delicious. 2 large onions Olive oil - lots (1/4 cup or so) 4-6 tsp minced garlic 1 large can diced tomatoes, or equivalent of chopped fresh tomatoes 4 Tbsp tomato paste 1 package frozen chopped spinach 2 cups cut green beans 2 cups diced butternut squash 2 medium potatoes, diced 4 large carrots, chopped 2 cups fresh green beans, cut into bite-sized lengths 2 tsp salt black pepper 2 Tbsp Italian seasoning (oregano/basil/thyme blend) Water or broth 1. Add olive oil to a skillet over medium heat. Chop the onions into small pieces and add to the skillet. Add garlic, as well. Allow to saute over for 10-15 minutes, stirring frequently to avoid over-browning. 2. Add onions/garlic to crock pot. Then add everything else. Stir. Add water or broth to bring the level to 3/4 up the side of the crock pot, or until soup is the desired consistency. If you don't use broth, I would recommend adding some extra salt. 3. Cook on high for 4 hours, or low for 8 hours. Serve topped with freshly grated Parmesan cheese. 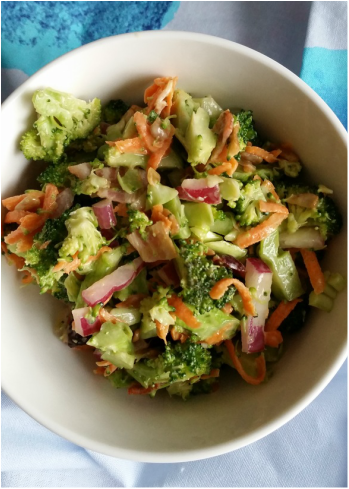 This is a paleo-friendly makeover of a summer potluck classic. I first had this over a decade ago when my good friend made this for a cookout, but in its classic form. Old school style involves broccoli, bacon, shredded cheddar, raisins, sunflower seeds, and a slightly sweet and tangy coleslaw-type dressing. I overhauled the recipe just a bit for a gathering we hosted on the fourth of July, taking the cheese out to keep it dairy-free, cutting down on the sugar in the dressing, and adding grated carrots for extra crunch and color. I made a huge bowl and it was gone by the end of the night. It was such a hit with my own family that I actually made another big batch this morning. This is the type of salad that can keep for a few days, and actually tastes better after the flavors have had an opportunity to meld as it chills.
One important piece: chop things very, very small. It tastes better. I don't know why - something about surface area and being able to get more little bits of different things into one bite. Ideally the dressing would be made with paleo-friendly mayo - either homemade or purchased. I used conventional because I have never mastered the art of mayo making. I would love to get good at it, but I have wasted many high quality products trying a few times and, sadly, have given up that fight. But I would imagine any number of alternatives would work fine in the recipe, even skipping mayo altogether, though it lends a creaminess I really like. Ingredients 4 cups of well-chopped broccoli 1/2 cup chopped red onion 1 cup grated carrots 1/3 cup dried cranberries 1/2 cup sunflower seeds For the dressing, combine the following in a separate bowl: 1/2 cup mayonnaise 1/4 cup olive oil 1/4 cup white vinegar 2 Tbsp sugar 1/2 tsp salt Mix veggies and dressing in a large bowl. Toss well to combine. Refrigerate for at least 4 hours before serving. Will remain delicious for about 1 week in the fridge. 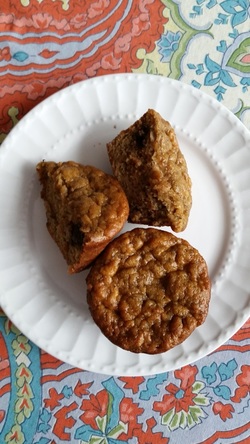 Today was supposed to be spent doing a 12-mile loop hike in the mountains, tagging two more 4,000 footers. But it rained. And yes, we could have gone in the rain. But it's so much more fun on a nice day. So it turned into a (much needed) day at home. Having just finished my first week at a new job, I needed some down time.
In the midst of working through a large sorting/cleaning/moving project, I decided to make some banana muffins. What I really wanted was banana bread, but even the GF flours bother me sometimes, so I decided to go with a grain free recipe. This is one that I've made once before, but I tweaked it a bit and it came out much better. The coolest thing about this recipe is that it has NO FLOUR. None. Not coconut. Not almond meal. Not rice flour. So I don't have to worry about the nut issue (son is allergic to tree nuts) or the "funny taste" of coconut that both kids complain about. This is a 6-ingredient recipe, and you won't believe it unless you try it. I throw my browning bananas into the freezer and save them for smoothies or baking. Today I happened to have 3. They thaw very quickly if you put them in a bowl of water...it took about 15 minutes this morning. I used peanut butter (not paleo, strictly) because we have a kid with tree nut allergies, but I'd love to try this with cashew or almond butter. And I used maple syrup that my older son made this spring when he and a friend tapped some trees on the property and boiled it down. Ingredients 1 cup nut butter 1 1/2 cups mashed bananas 1 tsp baking soda 1 tsp vanilla 3 eggs, beaten 1/3 cup maple syrup or honey 1 cup chocolate chips (optional) 1. Combine all ingredients in a mixing bowl. Stir until well combined. 2. Grease 12 muffin tins, and fill 3/4 full with batter. 3. Bake at 350 degrees for 20 minutes. The muffins will need to sit and cool for about 15 minutes until you attempt to eat them. They are initially quite soft, but will become a consistency such that you can pick it up and eat it just like a regular muffin. If you can't wait that long, I recommend a plate and a fork (from personal experience...). Yes, the name pretty much says it all. Except that it's delicious!! I'm more into mushrooms than ground beef these days, so I made these for myself as a burger alternative on a night when I made burgers for the men folk. I didn't get a picture because I ate it too fast! Next time.
I started the caps marinating, then the onions caramelizing, as soon as I got home from work. I sliced up some sweet potatoes and placed them on a lightly oiled cookie sheet, and preheated the oven to 400 degrees. The mushrooms only take 20 minutes or so grill to perfection, but the onions and sweet potatoes take about 40 minutes to get just right. Plan accordingly. Caramelized Onion Sauce Cook one large onion, chopped, in 2-4 Tbsp oil/butter (I used 1 part olive oil to 1 part butter) over medium-low heat for 30-40 minutes. Stir frequently. If the onion starts to brown really fast, turn the heat down, as they will burn given the right conditions. And that sucks, because then you have to start over, and it takes a while for caramelization to occur. (I speak from experience.) Marinade In a bowl, combine 1/4 cup oil (I used avocado oil this time), 1/4 cup rice vinegar, 2 Tbsp tamari sauce, 1/2 tsp salt, black pepper, and 1/2 tsp sage. Pour over mushroom caps and leave to marinade for at least 20 minutes. I also cut a red bell pepper into quarters and threw it in with the mushroom caps. Grill the mushrooms and peppers for 20-30 minutes, or until browned and soft. Serve mushroom cap topped with a red pepper slice and a generous pile of caramelized onions. I also topped mine with hamburger fixings - mustard, ketchup, and pickles. Enjoy with a side of oven-roasted sweet potato slices. 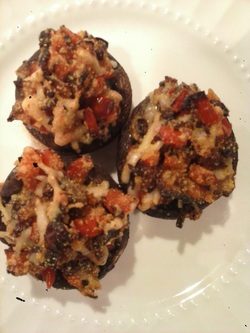 I love stuffed mushrooms, but because of gluten/grain content in most commercial varieties, I don't eat them anymore. Tonight I was craving them, so I created this recipe for myself. I ate it as an entree, but it would also make a great app for any occasion.
Several tablespoons olive oil or butter (I used a mix of both) 12 Mushrooms (I used baby portobellas) 1/2 onion, chopped 1/2 cup chopped red pepper 2 cloves garlic, minced 1/2 tsp salt 1/4 cup grated parmesan (optional ifyou are dairy-free) 2 Tbsp corn meal OR tapioca starch 1. Preheat oven to 425. Cut the stem out of the mushrooms, slightly hollowing out the cap. Chop the stems and set aside. 2. Place hollow caps on a cookie sheet. 3. Heat oil over medium heat. Add onions and cook for 5 minutes, until soft. 4. Add red pepper, chopped mushroom stems, garlic, and salt and cook for 5 more minutes. until all vegetables are soft.. 5. Put cooked veggies in a bowl. Add parmesan and corn meal or tapioca starch. Mix well to combine. 6. Spoon mixture into mushroom caps. Bake at 425 degrees for 15-20 minutes, until lightly browned. 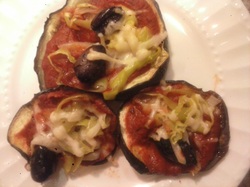 Pizza is probably one of the foods I miss most since being gluten-free. I have tried all kinds of pizza crust recipes and substitutes. Many of them are, frankly, just not worth the effort. (My fave so far is here.)Some come close to the chewy-stretchy perfection that defines most gluten-full crusts, but they still aren't the same. And most GF pizza crusts are still high in carbs, something that my body doesn't tolerate very well.
I have found humble eggplant slices to be one of the most nutritious and convenient crust replacements. I have also found that with the right toppings, I enjoy this form of "pizza" nearly as much as actual pizza. Tonight I topped my pizzas with sauce, bell peppers, onions, banana peppers, and olives. I find that, even though I mostly avoid cheese and milk, a little bit of parmesan is fine. I pre-bake the eggplant alongside the GF crust that I prepare for the boys, and we can all enjoy pizza together. Ingredients 1 large eggplant, cut into 1/2 inch slices Tomato sauce or crushed tomatoes Herbs and salt, if you just use crushed tomatoes Parmesan cheese, grated Pizza toppings: peppers, onions, mushrooms, olives, etc. 1. Place eggplant slices on a cookie sheet and sprinkle with salt. Allow to stand for 10 minutes. This will remove most of the bitter flavor from the eggplant. Rinse slices and pat dry when done. 2. Lightly oil the cookie sheet. Place slices on and pre-bake at 400 degrees for 10 minutes. After 10 minutes, flip them over and bake for another 10 minutes. 3. Remove from oven. Spoon on sauce, and add toppings. I put a very light sprinkling of parmesan on top and find this is enough cheesiness for me. I also find that very finely chopped toppings taste better. 4. Bake for another 10 minutes at 400 degrees. All done. :) 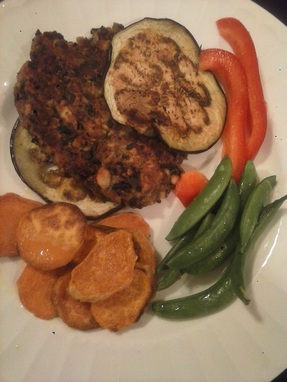 I love burgers, but I don't love ground beef. Back in my vegetarian days, I frequently ate various brands of veggie burgers, or made my own lentil or bean burgers. I have missed the Garden Burgers the most - I actually prefer a good veggie burger to a beef burger. But check out this list of ingredients in a national brandname veggie burger:
TEXTURED VEGETABLE PROTEIN (SOY PROTEIN CONCENTRATE, WHEAT GLUTEN, WATER FOR HYDRATION), CORN OIL, EGG WHITES, CALCIUM CASEINATE, CONTAINS TWO PERCENT OR LESS OF MODIFIED TAPIOCA STARCH, ONION POWDER, MIXED TRIGLYCERIDES, CANOLA OIL, HYDROLYZED VEGETABLE PROTEIN (CORN GLUTEN, WHEAT GLUTEN, SOY PROTEIN), DEXTROSE, SOY PROTEIN ISOLATE, NATURAL AND ARTIFICIAL FLAVORS, SALT, YEAST EXTRACT, SUGAR, CARAMEL COLOR, WHEY*, METHYLCELLULOSE, SPICE, GARLIC POWDER, MALTODEXTRIN, DISODIUM INOSINATE, DISODIUM GUANYLATE, SOY SAUCE (WATER, SOYBEANS, SALT, ETHYL ALCOHOL, WHEAT), AUTOLYZED YEAST EXTRACT, ASCORBIC ACID, THIAMIN HYDROCHLORIDE (VITAMIN B1), NIACINAMIDE, SESAME SEED OIL, SOY LECITHIN, IRON (FERROUS SULFATE), THIAMIN MONONITRATE (VITAMIN B1), PYRIDOXINE HYDROCHLORIDE (VITAMIN B6), RIBOFLAVIN (VITAMIN B2), VITAMIN B12. Never mind that I don't eat soy, gluten, most grains, or dairy anymore. Even barring that, there are so many ingredients that are unsavory. And they are processed, frozen, shipped, stored over such a long period that I'm quite sure that most of the nutrients have died a long, slow death by the time anyone actually gets to eat one. I've tried various homemade bean burgers over the years. They come out heavy and starchy and taste, well, like beans. They also bring with them all of the indigestibility of legumes, which I try to avoid for the most part. I've grilled portabella mushroom caps, which is nice, but not as satisfying as a burger you can sink your teeth into. Last spring, I made a batch of a veggie burger "dough" which included mushrooms, onions, garlic, carrots, peppers and ran it through my Vitamix. The result looked like (literally) a pile of horse crap in the skillet on my stove. Besides looking unappetizing, it didn't hold together and cooked unevenly when I tried to fry it as a patty. Most of it ended up in the trash. Pulling from different ideas I've seen online, and my own preferences for taste, and also needing this to be grain-free, I developed the following recipe. It was perfect - held together for cooking, had a firm, satisfying texture, and even looked kind of pretty - in a veggie burger sort of way. (For folks with nut allergies, I think this could be tasty without the nuts but would add in something else for some crunch in their place such as grated carrots, celery or peppers, diced finely, quinoa or oats if you eat grains. For vegans, you only need to replace one egg to make this a vegan recipe. Use your favorite egg replacer, or try no egg at all. I think they would probably still hold together because of the sweet potato.) Ingredients: 2 Tbsp olive oil 1/2 cup onion, chopped very finely 2 cups mushroom, chopped very finely (I used portabella caps) 2 cloves garlic, minced 1/2 cup sweet potato, diced 1 tsp tamari or Worcestershire sauce 1/3 cup nuts, chopped finely or food processed (I used a blend of almonds and cashews) 1/2 tsp salt 1 egg 2 Tbsp tapioca starch (regular flour or other starches could be substituted if you aren't gluten-free) 1. Heat olive oil in a large skillet. Add onion, mushroom, garlic, sweet potato, and saute over medium heat for about 10 minutes. 2. While it sautes, prepare nuts. I chopped them by hand, only because I couldn't find the right attachment for my blender. Add nuts and combine everything. Allow to cook for 5 more minutes. 3. Put mixture into a mixing bowl. Using a hand "masher", mash up the mixture as much as possible. The sweet potatoes will break down entirely, the mushrooms slightly. 4. Add salt, tapioca starch, and egg. Combine well. 5. Add a little more oil for frying to the skillet. Form the dough into two patties using slightly wet hands, and fry over medium heat, for 3-5 minutes on each side. The patties will brown up nicely. I served ours on eggplant slices that I had cooked at 400 degrees for 10 minutes on each side, along with sweet potato oven fries. We topped it with our favorite burger toppings - ketchup, mustard, pickles, etc. It was delicious. Next time I will double the recipe and freeze a few. |
AuthorI'm Emily. I currently work in online education management, but I also have a Masters degree in Nutritional Sciences (my true passion). In addition, I am a mom, cook, avid reader, novice gardener, and enjoy all kinds of outdoor activities. On my blog, you will find articles on food, fitness, weight management, and eating issues. ALL recipes on my blog are gluten-free. Many are low-carbohydrate. Most are grain free. Enjoy! 
Categories
All
Archives
June 2019
|
